The purpose of the 7 Step Movement Prep is to provide a quick, accurate, self-administered movement audit so athletes can prioritize their warm-up. There are thousands of mobilization techniques and activation drills. Athletes don’t need more drills, but rather need to know on which areas they should focus prior to training. Athletes don’t need to hammer on the same mobility drills indefinitely, but rather need standards to ensure that they have achieved the requisite mobility and stability prior to training. This series of 7 movement audits uncover asymmetries and restrictions across the entire movement chain from head to foot. When you find a problem, you can then focus on those problems in your warm-up, then recheck the movement prior to starting high demand athletic activity.
If you train in poor body positions, the repetition and resistance reinforce the bad movement pattern. Bad patterns leak energy, compromise performance, and cause injury. Injury can lead to consistent pain, resulting in a need for a long-term pain solution if it does not go away.
A successful movement audit reassures an athlete that they meet basic movement standards to achieve good positions. A failure in any of these tests indicates that a crucial movement is compromised. Find out what is causing the failure, fix the problem, audit the movement a second time, then move with confidence. As Grey Cook says, “First move well, then move often.”
1. Breathing Audit
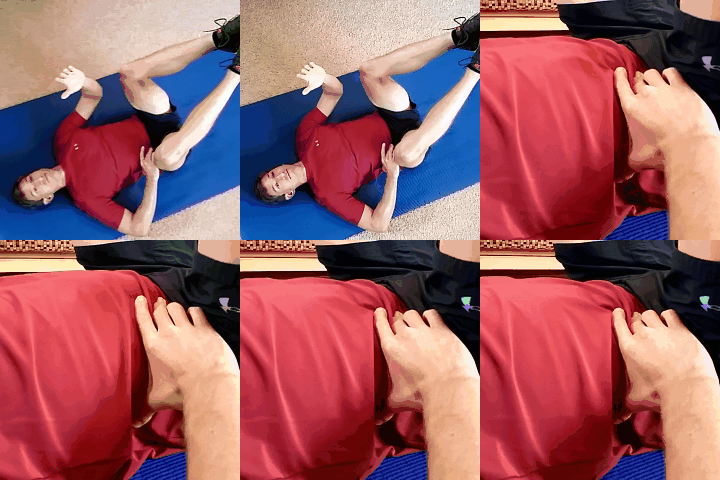
Baby belly breathing is a great way to reinforce good joint position and muscle balance. Focus on a long, flat spine, packed neck, depressed shoulders, ribs down, and balanced hips. Focus the breathing through the nose and into the abdomen. Breathe into the belly, and use your fingers as pressure sensors to assess your performance. Pressurize the abdomen with air. If you have difficulty getting into position or belly breathing, spend some time here with your feet supported on a box. Success with this position is a requisite for core stability in any other position.
2. Floor Angels Audit x 3
This is a three part audit of shoulder mobility. Successful overhead and barbell hang positions involve stability of the core and mobility of the shoulders. If the shoulders do not move well the core stiffness will turn off. Also, if the core is not stable, the shoulders will end up in bad positions.
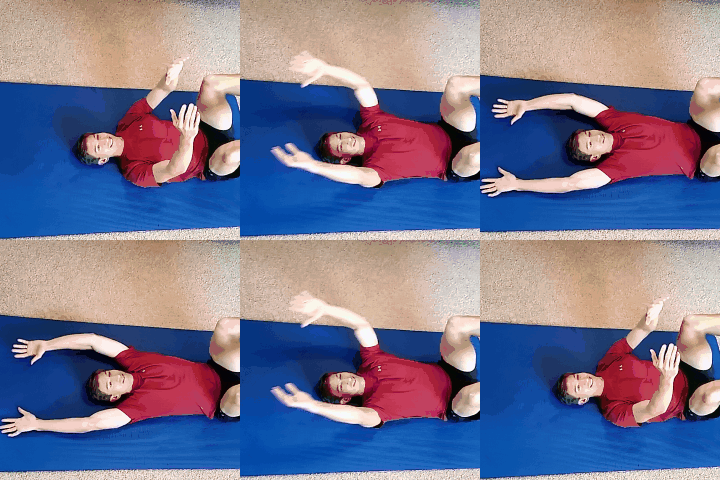
Start in your position of core stability and joint balance (baby breathing position).When reaching overhead, the arms should lay flat to the floor above the shoulder. The example above demonstrates maintenance of the ribs down, back flat position. The right arm passes the audit, but the left has a bent elbow and doesn’t touch the floor. Corrective examples include triceps/lat and thoracic mobilization.
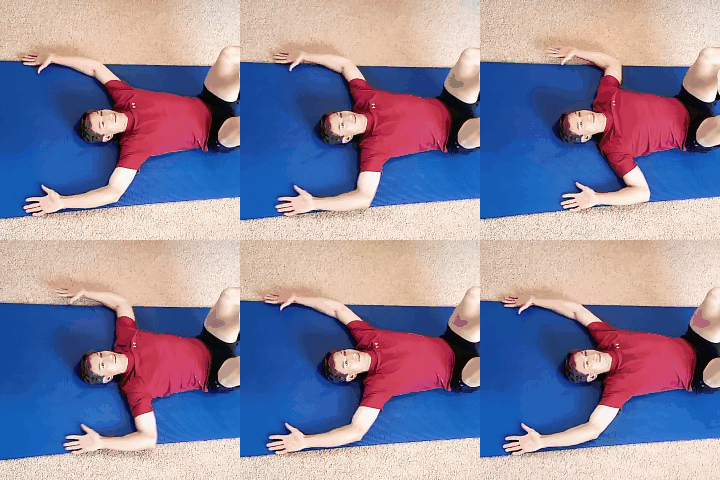
Part 2 involves first testing the starting position of arms, wrist, and hand comfortably flat to the floor. If something is restricted here (ie. pectoral muscles from yesterday’s push-ups) actively mobilize the area and recheck the movement. Slide the arms up and down to assess the shoulder through a variety of angles, maintaining the hand contact. In the example above, the left side fails the audit, as the hand pulls off of the floor because of short internal shoulder rotation muscles.
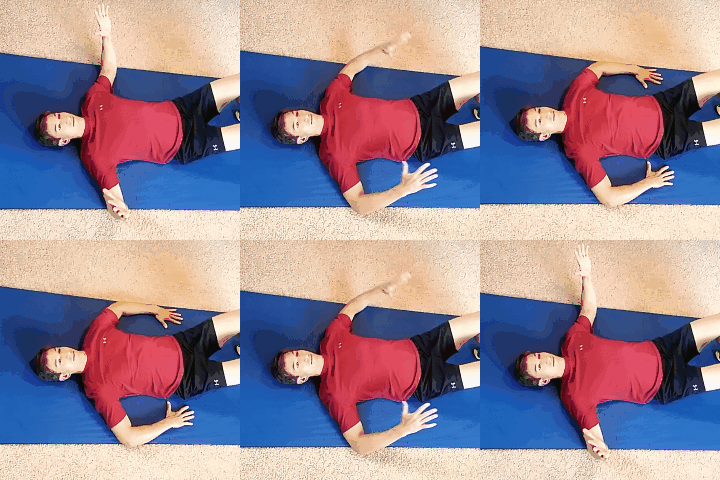
For part 3 of the Floor Angels Audit, compare shoulder internal rotation. From here you want to assess shoulder and upper back tension as you move into internal rotation. In this example, though it is hard to tell, the left shoulder rounds forward at full arm internal rotation.
3. Figure W and Figure 4 Audit
This 2 part audit assesses hip internal and external rotation. Hips are prone to getting tight and weak. When motion is not controlled by the hips, the less structurally stable knees and low back are forced into poor positions. When the hips move with balance and control, the core can retain stiffness and the knees are spared.
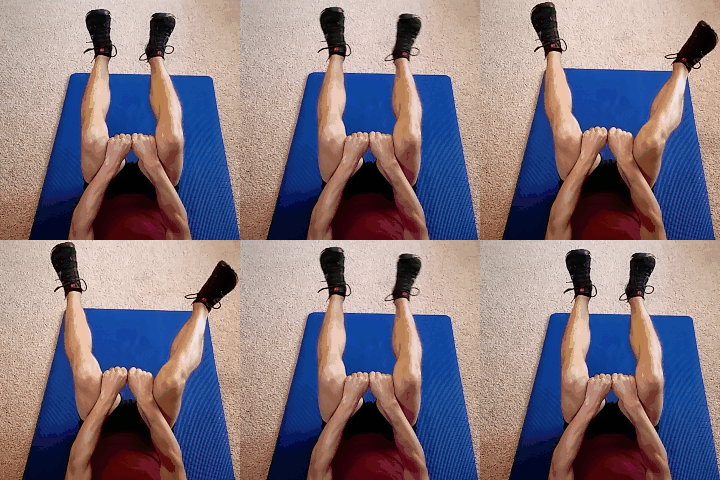
While still in the baby position, use your fists to maintain a fixed knee distance. Rotate your legs and ensure that you can see the same amount of leg on both sides (should be at least 35degrees). The above example of left-sided dysfunction may respond well to hip internal rotation stretching and/or activation of the internal rotation muscles.
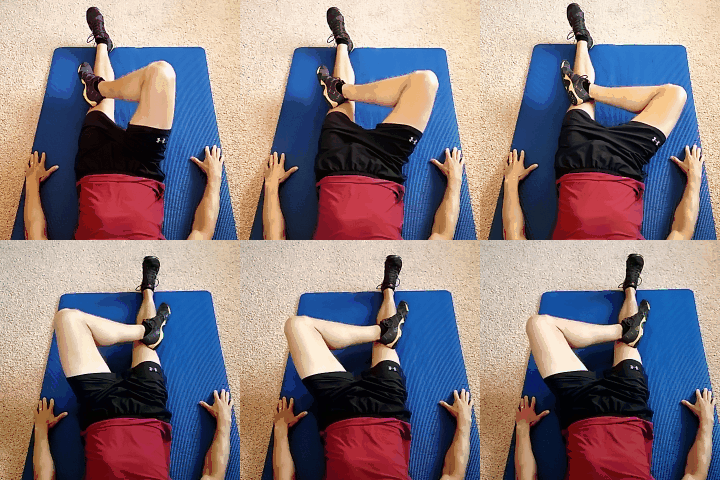
Just as in the previous movements, compare your tension from left to right. The figure 4 should be comfortable (no pinching at the hip). The shin should rest parallel to the floor. A lack of motion, as in the left leg above, likely indicates that one should stretch the groin to achieve balance. Prying goblet squats and lateral lunge are examples of helpful correctives.
4. Leg Raise Audit
This audit reveals tension along the posterior chain from hip to the base of the foot. Shortening of the posterior chain compromises pulling positions.
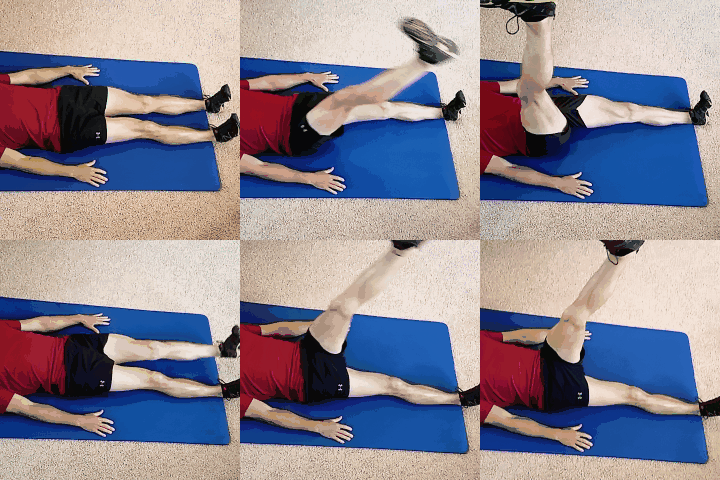
The movement standard is for the leg to rise straight up perpendicular to the floor. Simply having tension is at the top of a full 90 degree movement is not an indicator of any problem. Ensure there is symmetry of full, quality motion. The above example reveals left leg tension because the leg fails to reach perpendicular to the floor. Consider active mobilization of the hamstrings and calf while maintaining a neutral pelvis.
5. 8″ Step Down Audit
Being able to step down from an 8 inch height is the movement standard. This is also convenient to test because building codes ensure that most steps are 7-8″. Having the minimum amount of ankle dorsiflexion mobility allows the knee and foot to maintain their stability. On the other hand, an ankle that fails to meet the minimum, 8″ standard forces the foot and foot into bad positions with walking, running, and squatting.
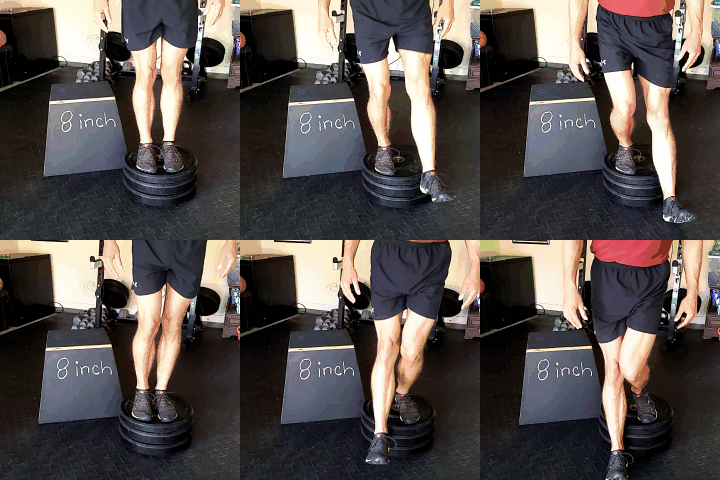
Step forward from an 8″ height, keeping the stance foot straight forward, knee advancing over the second toe, and stance heel flat. Tap the advancing heel to the floor and comfortably return. In the example above, the left heel lifts off of the plate, the left knee collapses inward, and the movement is not smooth. Corrections would include ankle mobilization and single leg stability activation.
6. Lunge Audit
Training with tight hip flexors is like driving with the parking brake on. When the hips are tight, the potentially powerful glutes are reflexively inhibited forcing the low back and hamstrings to overwork. But muscular balance around the hips are crucial to maintain a stiff, power-transferring torso. Most cases of activity induced low back pain are associated with failure of the lunge audit.
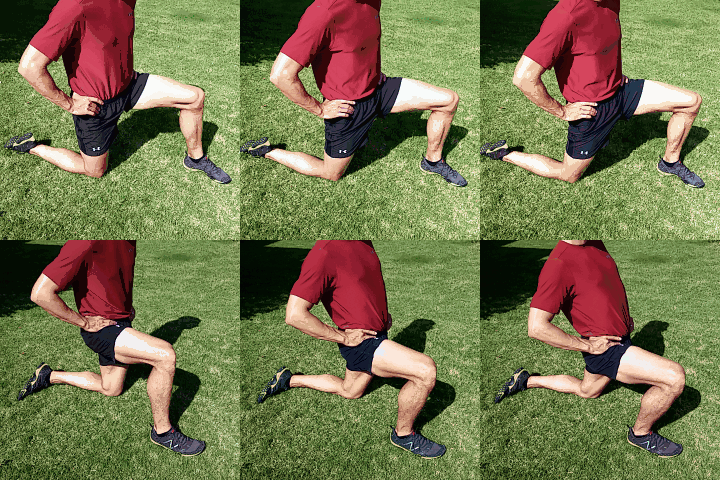
Get into a lunge position with the low back flat and pelvis tucked. This position alone usually generates tension at the front of the rear hip. While maintaining the tucked hips fire the rear butt and advance straight forward about 4 inches. Compare tension across the front of the hip and thigh. In the example above, with the left leg to the rear and right leg forward, the low back arches and the pelvis tips downward. The rear thigh is also externally rotated away from the body. Corrections should include improving pelvic tilt control and isolated hip flexion muscle mobilization.
7. Overhead Squat Audit
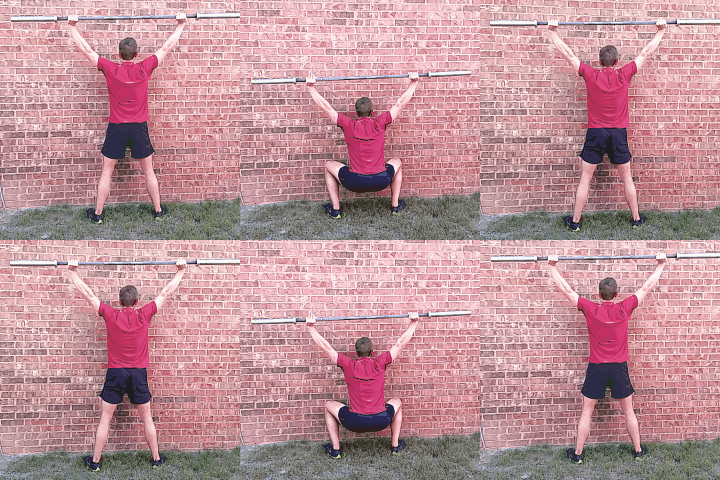
Lastly the overhead deep squat should be comfortably successful as long as other problems in the previous 6 audits have been resolved. The overhead squat is the penultimate screen for stability and mobility in the sagittal (front to back) plane. Yet, if there is a problem, it may not be readily apparent which body regions are involved. Where the tension is felt is not always the problem when assessing global movement.
For the purpose of a self-adminstered movement audit, use a wall (brick walls are sufficiently sturdy) to ensure an upright posture.